
if oreos got a french makeover
I skipped posting last week because I completely failed on my first attempt at French macarons. It took me hours and a huge mess in the kitchen, and all I wound up with was runny batter and flat, inconsistent “cookies.” Not sure why I was so hard on myself since I knew how much technical skill goes into making French macarons. But I thought I was well-prepped and had done enough research to get this one right on the first try. Yeah, right!
Well, after feeling like I had wasted all those ingredients, all that time, made such a mess, and didn’t even have any content to post on here for the week, I realized that I had at least known where I went wrong in my first attempt. And a lesson learned is not a fail at all! And not everything that goes up on the Internet has to be perfect because that’s not real. We don’t always (or usually) get things right the first time in life, and that’s perfectly okay and not something to ever really be embarrassed about. So, rather than not posting when my bakes don’t turn out as planned, I’ve decided that’s not a reason not to create this content, nor a reason to skip a week posting because the content is the lesson itself. With that, I’m adding a new section on here for a series called: baking bloopers.
I’ll post my mistakes, tips I learned from those mistakes, and will continue to update the posts until I get it right.
So, to start off the first post of baking bloopers, here’s a photo last week’s first attempt at French macarons:

Excuse the caption - I forgot to save a picture aside from my Instagram Story. Also, check out that 33 week preggo bump!
After getting these sloppy (but tasty) little cookies, I realized I made 2 very big mistakes:
I did not sift my dry ingredients finely enough. I was much too impatient with that step. I also realized my sieve wasn’t large enough for my impatience and that I should probably take more steps sitting down with this growing belly & these increasingly swollen pregnant feet!
My peaks were not stiff enough. I thought I had gotten my egg whites to stiff peaks, but turns out, they need to be REALLY stiff peaks. So stiff that the egg whites feel like marshmallows and you can actually pull out multiple peaks when you remove the whisk from the meringue.
Once I realized my mistakes, I watched a ton more videos and read up on more tips & tricks. I also got a couple more inexpensive little tools that helped compensate for my unsteady hands and impatience during the sifting process. “What tools?” you ask?
To help with the sifting process, I got a handy little 3-cup hand crank sifter. This made sifting the almond flour, powered sugar, and cocoa powder extra fine much much easier than my small 1-cup sieve. It also helped to keep the mess a bit more tamed than last week!
To help with my unsteady hands and keep the macarons more uniformed in size, I got this macaron silicon mat. I didn’t even know these existed until I came across some videos that used them. I figured if expert bakers could admit that they need a little cheat for this step, then I could use one too.
With more knowledge, lessons learned from my first try, and the right tools on hand, I confidently entered this weekend ready to conquer this patisserie delight!
First step: sift the dry ingredients together very finely. To be extra cautious, I actually sifted the dry ingredients three times over! Or maybe I was just playing with my new toy :)

These are my dry ingredients pre-sift.

And here they are after three rounds of sifting. Extraaaaa foine.
Next, you whisk the egg whites until you can’t whisk anymore and your arm feels like it’s going to fall off! Just kidding… you’ll definitely need an electric hand mixer or a stand mixer for this step. Even with a stand mixer on the max speed, I was getting impatient at how long it took to get to the extra stiff peaks needed. I can’t imagine how French bakers used to pull this off pre-appliances or electricity! As mentioned above, whisk them until you’ve got a meringue that feels like marshmallows when you drag a whisk through it and you pull out multiple peaks onto your whisk.
Once you’ve got your meringue with extra stiff peaks, then starts the macronage process. Apparently this part is best done by hand, and I did not take any short cuts here. You’ll need to first fold in about one-third of your dry ingredients into your meringue using a spatula. Folding is key here so that you don’t create extra air bubbles. Once that first third is incorporated, add the remaining dry ingredients and continue to fold until it’s all incorporated and the mixture resembles lava. A ton of recipes online kept saying that, but I really couldn’t tell what lava meant. I thought I got to a lava-like consistency last week and that was too runny! John Kanell of Preppy Kitchen described it best in his video where he showed that the mixture should fall off the spatula so that you can form a figure 8 in the bowl, but the 8 doesn’t incorporate back into the mixture right away. He also made an incredibly helpful YouTube video that I watched several times, especially to understand the right type of stiff peaks to watch out for!
When you’ve got that lava-like mixture forming figure 8’s, transfer the mixture to a piping bag with a round tip and begin forming your cookies. I used my new macaron mat, but if you have steady hands and can pipe 1-inch circles easily onto parchment paper, then go for it! You saw what my macarons looked like last week though (which was also a combination of not finely sifted dry ingredients and meringue that wasn’t meringue-y enough).

Air bubbles are another one of macaron’s enemies. To get the air bubbles out, you have to bang the tray a few times really hard on the counter. This not only lets the bubbles out, but also flattens the mixture out. Because of that, I didn’t fill the wells all the way to the edges. After a few bangs on the counter, the batter pushed its way out to the edges itself. Then, just let these little guys sit for a bit. They’re ready to bake when you touch the top and it’s dry to the touch. This usually takes about 40 minutes. Once they’re ready, just pop ‘em into the oven for 12 minutes at 300F.
Apparently, they can only go into the oven as one layer at a time. So if you’ve got two trays of macarons that don’t fit on one shelf in your oven, bake them one at a time. Don’t stack them up in there as that can change how the heat gets distributed and will mess up how they end up baking in there.
If you’re good at multi-tasking, go ahead and start on your filling while they’re in the oven. You could also get started on your filling while they’re resting before you popped them into the oven. You can fill your macarons with just about anything from jams, chocolates, curds, etc. I went with a classic vanilla French buttercream.
My idea here was to give the Oreo a French makeover. Chocolate macaron cookies sandwiching a vanilla French buttercream. So after my first failed attempt, a week of wallowing in my baking woes, a little more research, and a few bucks on Amazon, here’s what we got! A baking blooper no more!
Base recipe from Preppy Kitchen, but tweaked a bit to make chocolate macarons instead of the classic recipe.
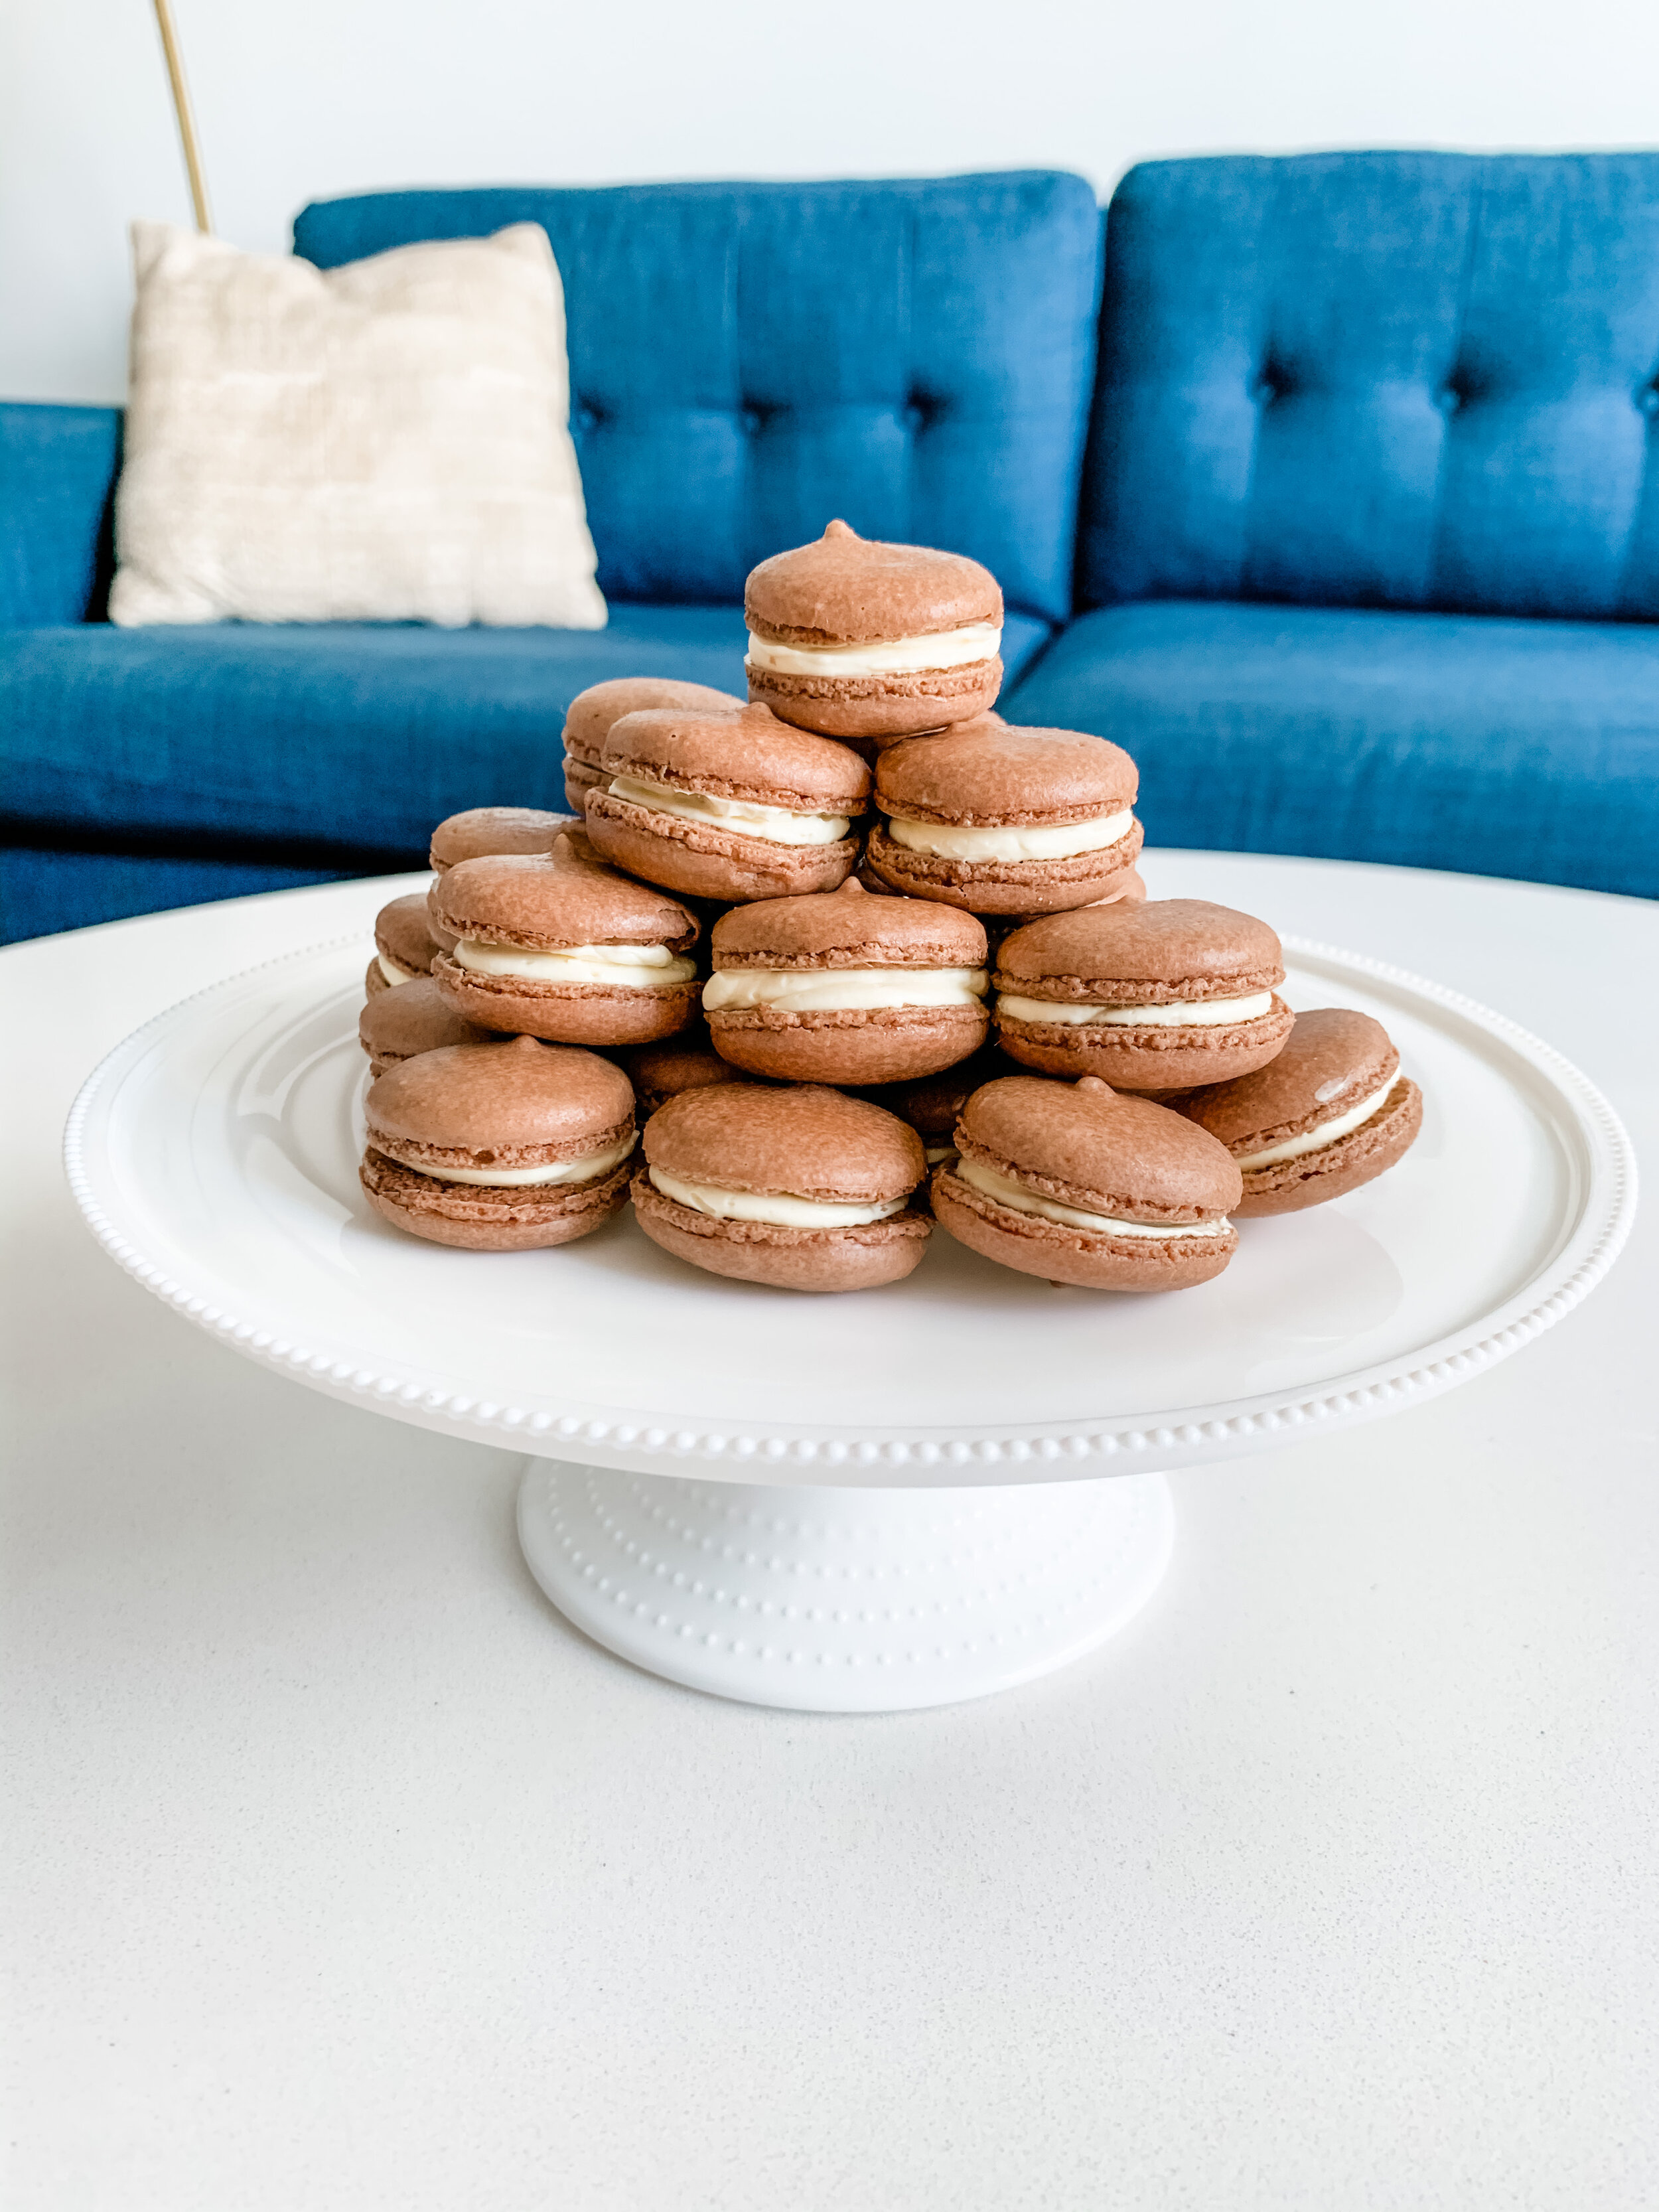
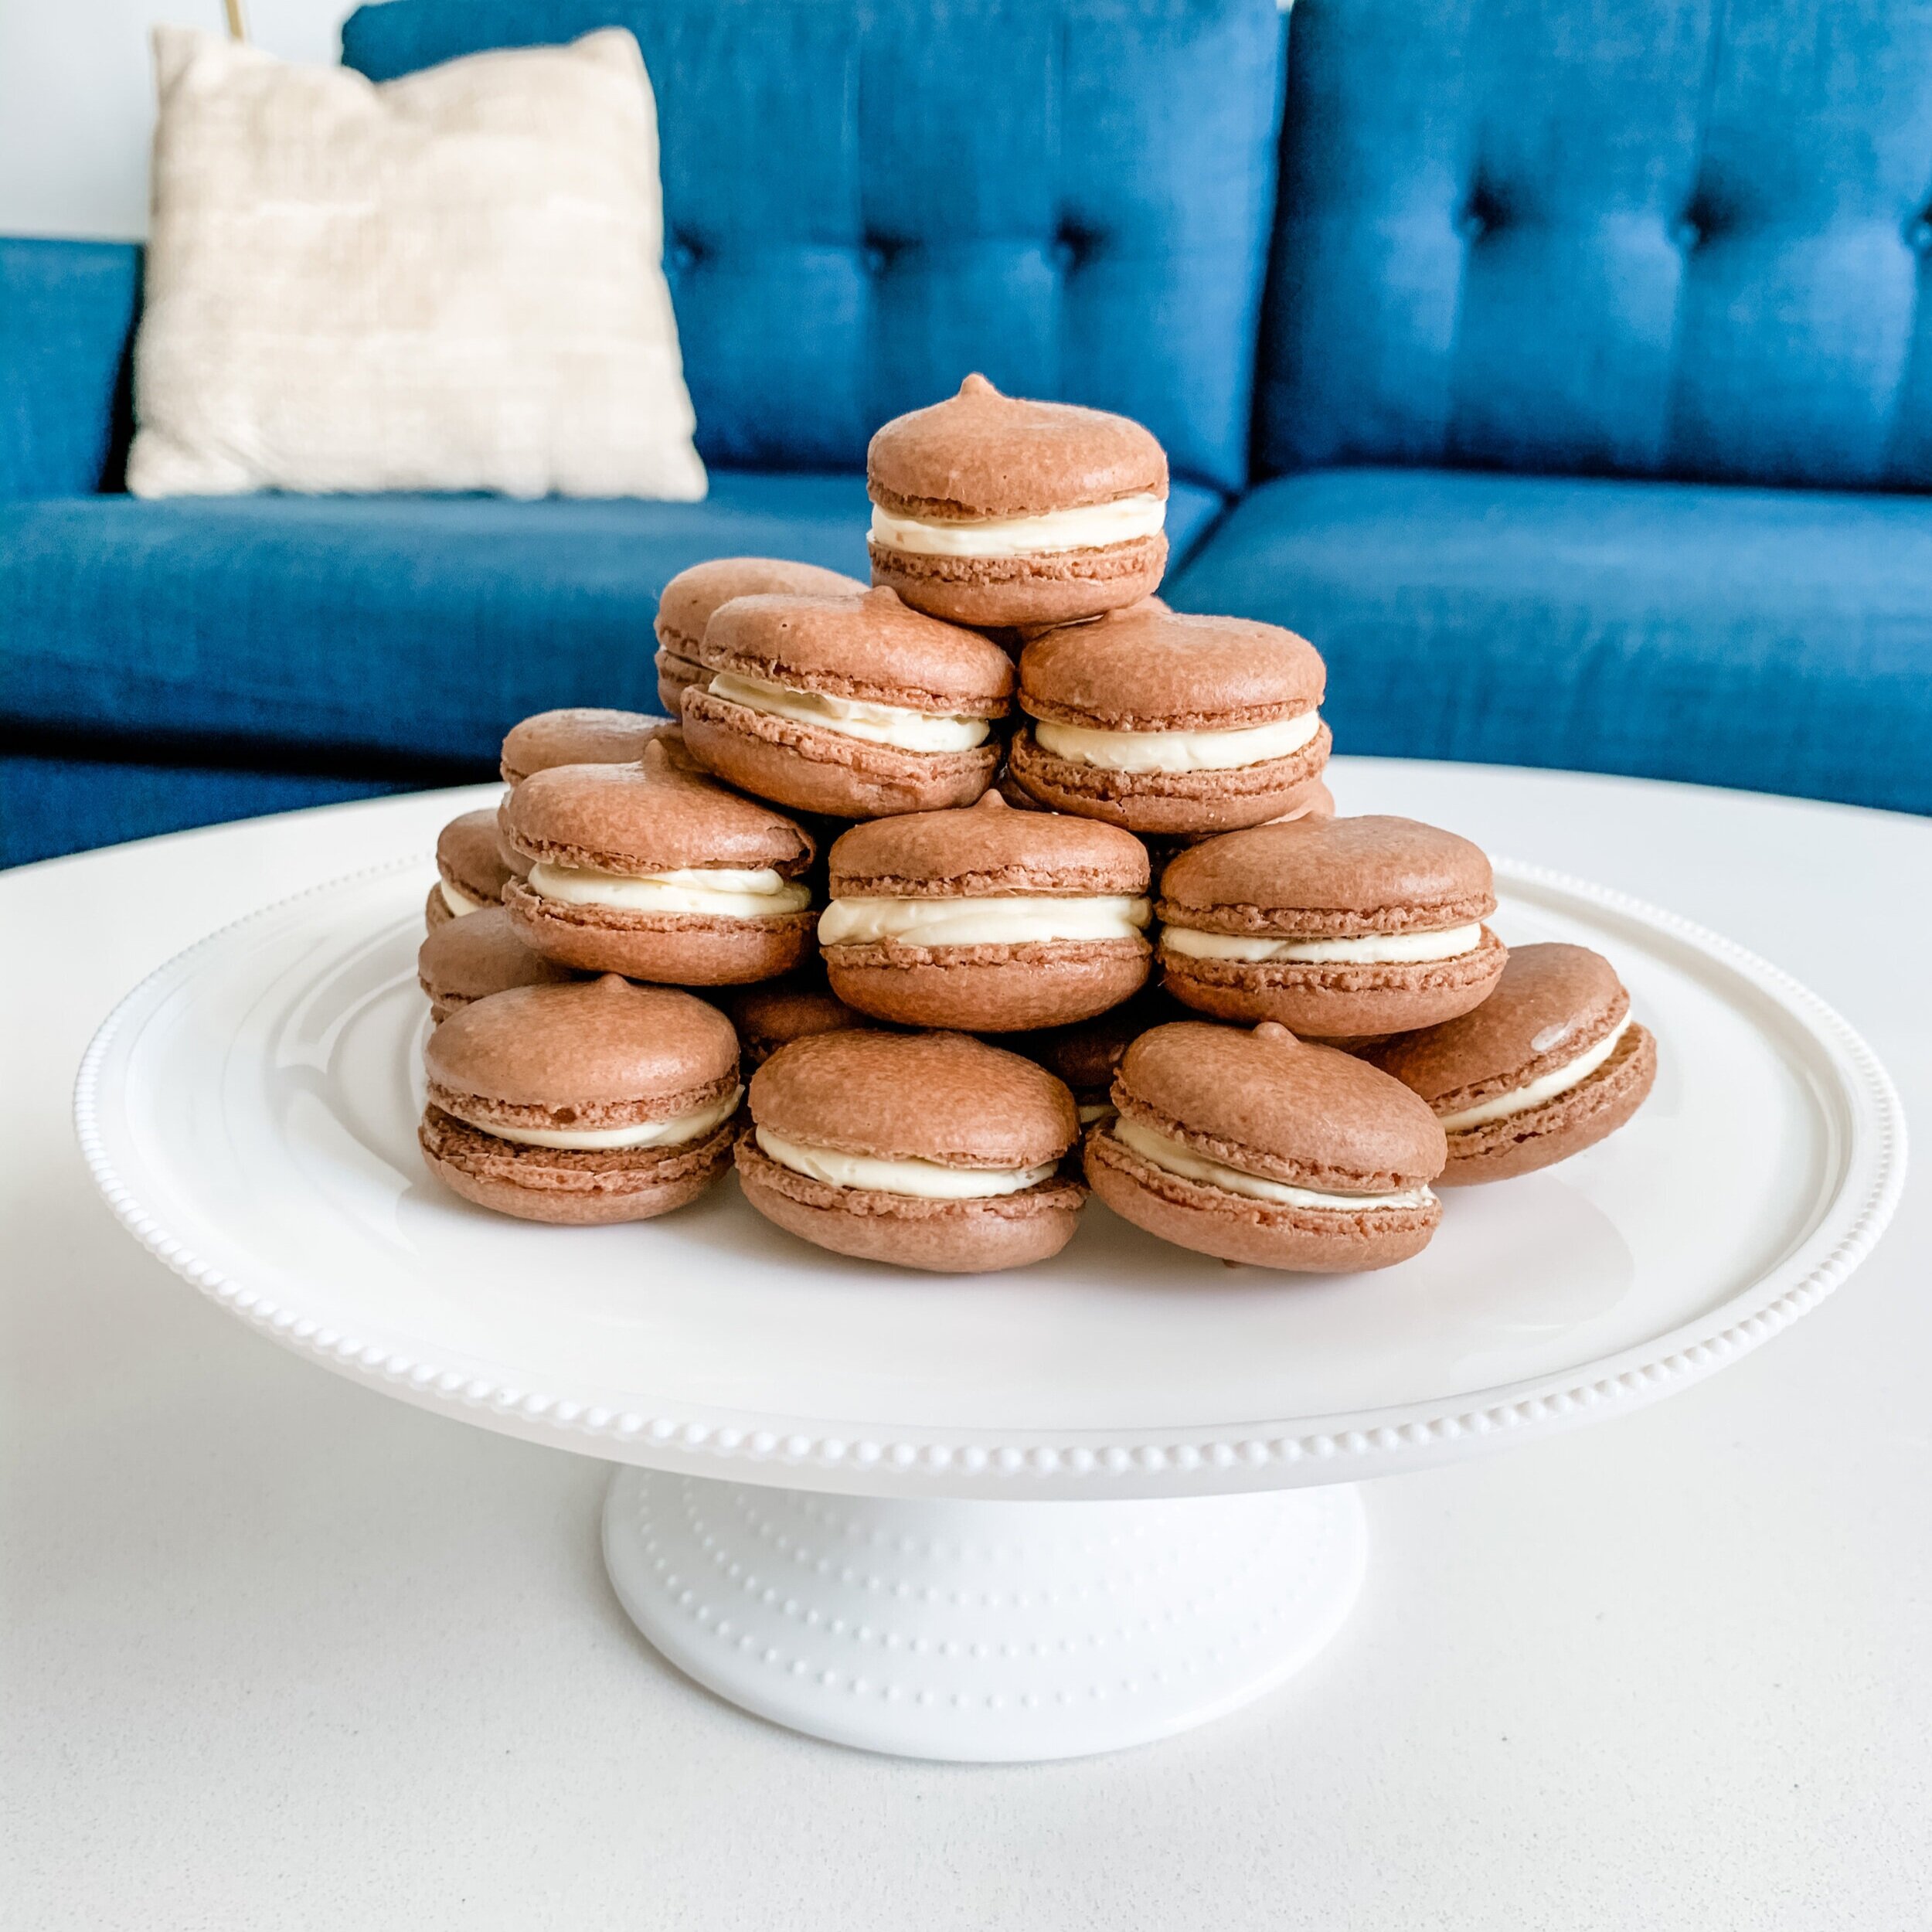
chocolate macarons with vanilla french buttercream
Prep Time: 15 mins | Bake Time: 12-15 mins | Inactive Time: 40 mins | Total Time: 1 hour, 10 mins
Makes 30-35 1-inch macarons
MACARON COOKIE INGREDIENTS:
100 egg whites, room temperature (about 3 large eggs)
140 grams almond flour
90 grams granulated sugar
115 grams powdered sugar
15 grams unsweetened cocoa powder
1/4 teaspoon cream of tartar
VANILLA FRENCH BUTTERCREAM INGREDIENTS:
1 C unsalted butter, room temperature and cubed
5 egg yolks
100 grams granulated sugar
1 teaspoon vanilla extract
3 tablespoons water (30 mL)
1 pinch of salt
DIRECTIONS:
Sift the powdered sugar, almond flour, and cocoa powder into a bowl. Repeat 2 more times.
Add the room temperature egg whites into a large mixing bowl or bowl of your stand mixer. Make sure your bowl is very clean.
Using an electric hand mixer or a stand mixer with the whisk attachment, whisk the egg whites. Once they begin to foam, add the cream of tartar and whisk until incorporated. Slowly add the granulated sugar. Increase the mixer speed to high and beat until stiff peaks form. The egg whites should collect in the whisk attachment, and feel like marshmallows when you run a whisk through it. Multiple peaks should attach to your whisk when you pull it out of the meringue.
Using a spatula, fold one-third of the dry ingredients into the meringue. Add remaining dry ingredients and fold gently until it’s fully incorporated and the mixture flows like lava and can form a figure 8 that does not dissolve back into the mixture.
Spoon the mixture into a piping bag with a round tip.
Pipe into 1-inch circles or onto a macaron mat holding the piping bag at 90-degrees or perpendicular to the counter.
Tap the baking sheet hard onto the counter several times until air bubbles are released. Carefully pop any remaining air bubbles with a toothpick.
Allow it to sit for 40 minutes before placing in the oven.
While the pre-baked cookies sit, pre-heat the oven to 300F and make the filling. Combine the sugar & water in a medium saucepan. Heat over low heat while stirring until the sugar dissolves. Increase to medium-high heat and bring to a boil. Cook until the syrup reaches 240F.
While the syrup cooks, put the yolks in a stand mixer with the whisk attachment and beat until thick & foamy and it turns a pale yellow.
Remove the syrup from the heat and carefully pour it into the egg yolks while the mixer is still running on medium speed.
Continue mixing until the bottom of the bowl is cool to the touch, and the yolk mixture is room temperature.
Add the butter 1 cube at a time while the mixer is running on medium speed. Allow each cube to incorporate before adding the next.
Add the vanilla & salt, and mix until smooth & creamy. About 5-6 minutes. Transfer to a piping bag with round tip.
When cookies are dry to the touch, transfer baking sheet to the oven. Bake for 12-15 minutes.
Remove from the oven and allow the cookies to cool completely before removing from the baking sheet or macaron mat.
Carefully remove the cookies and assemble macarons. One at a time, take a cookie, pipe the filling onto the cookie, then top with another cookie. Repeat until all macarons are assembled.